Creating a Window
After going through this page u should be able to build a single views window.
Views has a main class called Views.form which implements the whole views concept. Instance of this class will generate a single window on the screen. i.e. the following statement will generate a window with specified XML controls.
Views.Form v = new Views.Form(@" XML specification..... ")
After a window has been created, different controls such as buttons, labels, textbox and picturebox can be added on the window. At the end of this tutorial we will discuss how the VIEWS system handles the interactions to these controls. Below we discuss a special Views tag that is called Form.
Form encloses the entire XML specification and it is responsible for identifying interactions that are performed by the user. The syntax used to enclose the XML specification is:
<form Text = S BackColor = C ForeColor = C>
...XML specification
</form>
Text attribute indicate the text that is displayed on the Window, while BackColor and ForeColor are the colors on the Background and Forefront of the Window respectively.
Note that sometimes a Views window can be referred to as a Form and we will do the same throughout the tutorial.
Creating a window example
The example below shows a simple views window without anything on it.
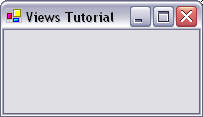
Example 2.1.1: Source
below we have provided the code that is responsible for generating the image above.
| Views.Form view = new Views.Form(@"<Form Text = 'Views
Tutorial '>
</Form>") |
Now that we can create a window, the next pages illustrate how we can add different controls on to the window and how we can manipulate these controls.